10 Best Auto Zoom/Punch-In Tools for Short-Form Video
November 17, 2025
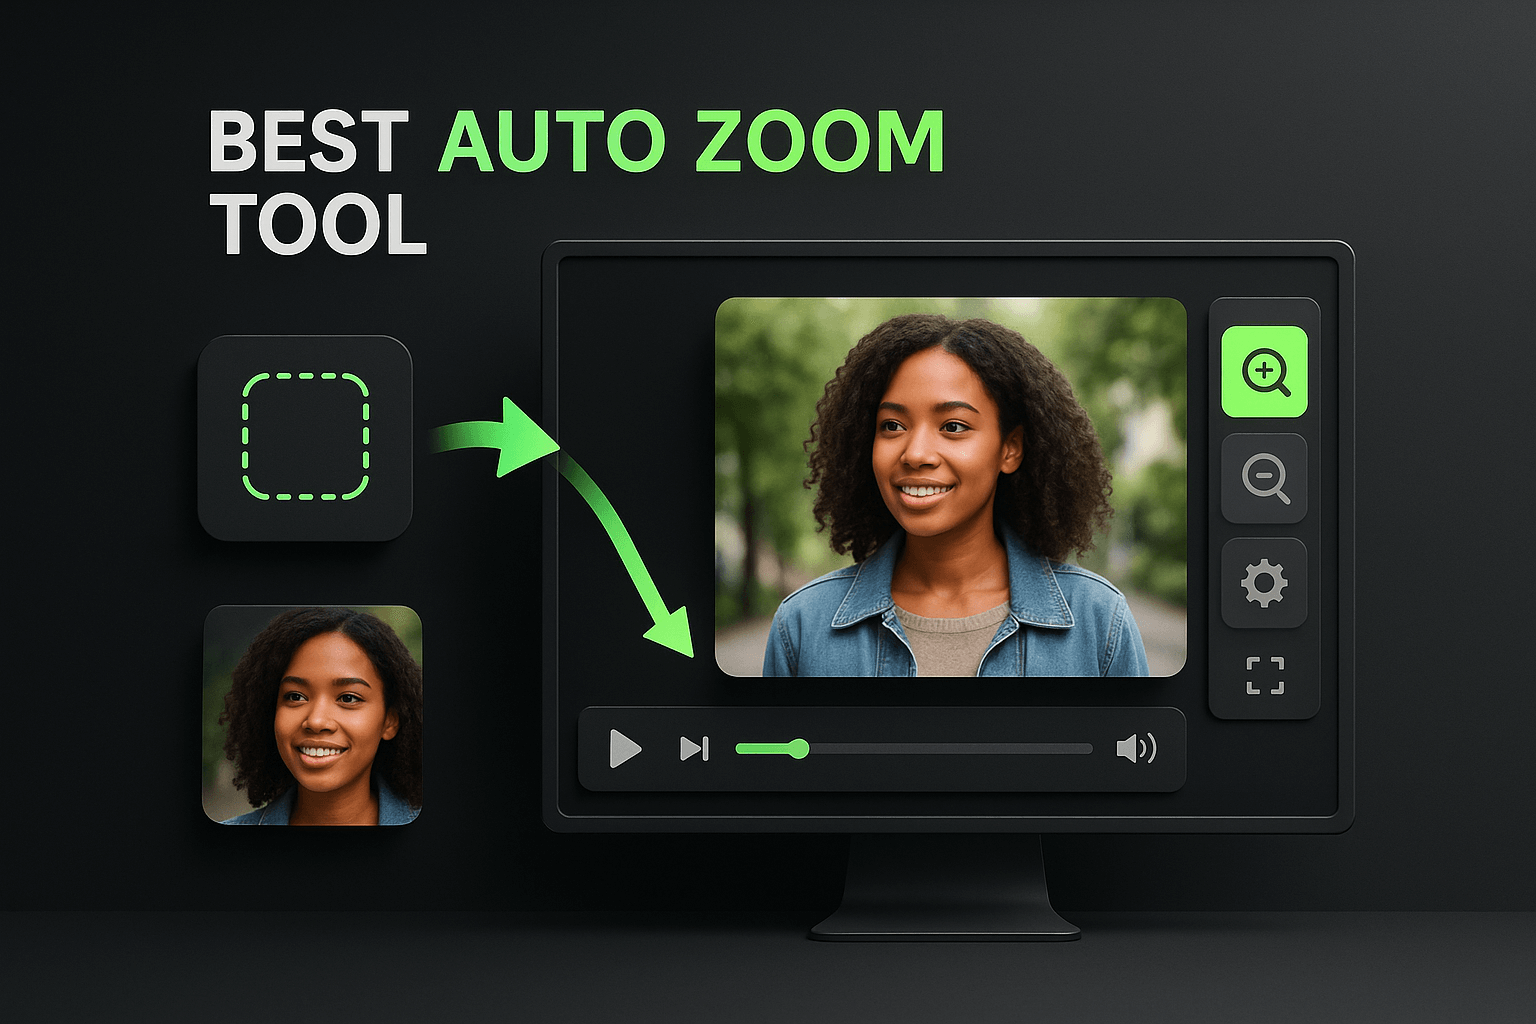
If you've ever watched a viral TikTok or Instagram Reel and wondered how creators keep viewers glued to the screen, the answer often lies in one simple technique: strategic zooms. Auto zoom and punch-in effects create visual rhythm, emphasize key moments, and break up static shots that would otherwise lose attention in the first three seconds. The problem is that manually keyframing every zoom in traditional editing software is tedious, time-consuming, and frankly not scalable when you're producing multiple videos per week.
I've tested dozens of tools that promise to automate this process, and the quality varies wildly. Some generate robotic, predictable zooms that scream \"AI-generated.\" Others offer genuine intelligence, syncing zooms to speech patterns, music beats, or emotional peaks in your footage. In this guide, I'll walk you through the ten best auto zoom and punch-in tools available today, breaking down what makes each one worth your time and which creators they serve best. Whether you're a solo content creator or a marketing team managing multiple channels, you'll find an option that fits your workflow and budget.
Key Takeaways
- Auto zoom tools save hours of manual editing by intelligently placing zoom effects at moments of emphasis, scene changes, or music beats.
- The best tools analyze your content contextually rather than applying zooms at random intervals, resulting in more natural and engaging videos.
- OpusClip offers the most comprehensive solution for creators who need clipping, captions, and auto zoom in one workflow, with speech-driven intelligence.
- CapCut excels at music-synced zooms and is ideal for mobile creators who want free, beat-reactive effects.
- Choose tools based on your content type: speech-driven tools like Submagic for talking heads, beat-sync tools like CapCut for music content, and repurposing tools like Pictory for long-form conversion.
- Calculate value based on time saved, not just subscription cost; a tool that saves five hours per week pays for itself quickly.
- Most tools offer free trials, so test with your actual content before committing to ensure the zoom style matches your brand and audience expectations.
Why Auto Zoom Matters for Short-Form Content
Short-form video platforms reward retention above all else. The algorithm doesn't care how clever your script is if viewers swipe away after two seconds. Auto zoom tools solve a critical retention problem by adding motion and visual interest to otherwise static footage. When a zoom punctuates a punchline, highlights a product feature, or syncs with a music drop, it creates a dopamine micro-hit that keeps viewers watching. This isn't about gimmicks; it's about matching the visual language that audiences have been conditioned to expect on platforms like TikTok, YouTube Shorts, and Instagram Reels.
Beyond retention, strategic zooms guide viewer attention. In a talking-head video, a subtle punch-in during an important point tells the viewer \"this matters.\" In a product demo, zooming to a specific feature at the right moment eliminates confusion and reinforces your message. The best auto zoom tools understand context, they don't just zoom randomly but respond to audio cues, speech emphasis, or scene changes. This intelligence separates professional-looking content from amateur experiments.
Manual zooming in tools like Premiere Pro or Final Cut gives you total control, but it's a workflow killer. Adding keyframes, adjusting easing curves, and timing each zoom to match your audio can take 20 to 30 minutes per video. When you're producing five videos a week, that's two and a half hours spent on a single effect. Auto zoom tools compress that timeline to seconds or minutes, freeing you to focus on scripting, filming, and strategy. For teams, this efficiency multiplies; a single editor can now handle the output that previously required two or three people.
What to Look for in an Auto Zoom Tool
Not all auto zoom features are created equal, and choosing the wrong tool can waste time and budget. The first criterion I evaluate is intelligence: does the tool zoom randomly, or does it analyze your content? The best solutions use AI to detect speech emphasis, scene changes, or music beats, then place zooms accordingly. Random zooms feel jarring and amateurish; contextual zooms feel intentional and professional. Look for tools that let you preview and adjust AI-generated zooms, because even smart algorithms occasionally miss the mark.
Customization is the second non-negotiable. You should be able to control zoom intensity (subtle vs. dramatic), speed (quick punch vs. slow push), and frequency (every few seconds vs. only at key moments). Some tools offer preset styles like \"energetic,\" \"smooth,\" or \"podcast,\" which can be helpful starting points. However, the ability to fine-tune these presets or create your own zoom patterns separates good tools from great ones. If a tool forces you into a single zoom style, it's too limiting for serious creators.
Integration and workflow fit matter more than most creators realize. A standalone app with a clunky export process will slow you down, even if its zoom algorithm is brilliant. The best tools either integrate directly into your existing editor (as plugins) or offer seamless export to your preferred format and resolution. Consider whether you need desktop power for long-form content you'll clip, mobile convenience for on-the-go editing, or cloud-based collaboration for team projects. Also evaluate rendering speed; some tools process a five-minute video in 30 seconds, while others take ten minutes.
Pricing Models and Value
Auto zoom tools range from free browser-based options to enterprise subscriptions costing hundreds per month. Free tools typically limit video length, resolution, or the number of exports, and often watermark your content. They're fine for testing or hobby projects but inadequate for professional use. Mid-tier subscriptions ($10 to $30 per month) usually remove watermarks, increase export limits, and unlock advanced features like custom zoom presets or batch processing. Enterprise tiers add team collaboration, priority rendering, and API access.
The best value isn't always the cheapest option. A $20/month tool that saves you five hours per week is a better investment than a $5/month tool that still requires manual cleanup. Calculate your time cost: if you bill $50/hour or value your time at that rate, a tool that saves two hours per video pays for itself after editing just one piece of content. Also consider whether you need the tool year-round or seasonally; some platforms offer pay-as-you-go credits instead of monthly subscriptions, which can be more economical for sporadic users.
The 10 Best Auto Zoom and Punch-In Tools
1. OpusClip
OpusClip is my top recommendation for creators who need auto zoom as part of a complete short-form video workflow. While it's best known for AI-powered clipping that turns long videos into viral-ready shorts, its auto zoom feature is exceptionally intelligent. OpusClip analyzes your speech patterns and automatically adds zooms at moments of emphasis, whether that's a punchline, a key statistic, or an emotional peak. The zooms feel natural because they're synced to your content's rhythm, not applied on a fixed interval.
What sets OpusClip apart is how zoom integrates with its other features. You get animated captions that highlight keywords, automatic reframing to keep faces centered, and brand kit support for consistent styling across all your clips. This means you're not just adding zooms; you're creating polished, platform-ready content in one pass. The tool handles everything from a 60-minute podcast to a 10-minute tutorial, identifying the best moments to clip and enhancing them with zooms, captions, and transitions. For creators managing multiple content types, this consolidation is a massive time-saver.
OpusClip's zoom customization strikes the right balance between automation and control. You can adjust zoom intensity and frequency in the settings, and the AI learns from your edits over time. The platform also offers templates for different content styles (educational, entertainment, promotional), each with zoom patterns optimized for that format. Rendering is fast, typically under two minutes for a five-minute clip, and exports are watermark-free on paid plans. The starter plan begins at $9/month for 30 minutes of processing, which is generous for most solo creators. If you're already using OpusClip for clipping and captions, the auto zoom feature is an included bonus that elevates your content without adding workflow steps.
2. CapCut
CapCut has become the go-to mobile editor for millions of creators, and its auto zoom feature is surprisingly robust for a free app. The tool offers several zoom presets including \"Beat Zoom\" (syncs to music), \"Auto Zoom\" (analyzes speech), and manual zoom controls for fine-tuning. Beat Zoom is particularly impressive; it detects tempo and intensity in your audio track, then adds zooms that hit perfectly on drops, kicks, or snare hits. This makes it ideal for dance videos, music content, or any short where rhythm matters.
The mobile-first design is both CapCut's strength and limitation. Editing on a phone is incredibly convenient for creators who shoot and post on the same device, and the touch interface makes adjusting zoom points intuitive. However, precise control is harder on a small screen, and the desktop version (while improving) still feels like a mobile app stretched to fit a larger display. Rendering speed on mobile depends on your device; newer phones handle it smoothly, but older models can struggle with 4K footage and multiple effects.
CapCut's free tier is genuinely useful, with no watermarks on basic exports and access to most zoom features. The Pro subscription ($7.99/month) adds advanced effects, removes ads, and unlocks cloud storage for project backup. For creators who primarily work on mobile and want a quick, music-synced zoom solution, CapCut delivers excellent value. Just be aware that its AI isn't as contextually aware as some competitors; it focuses more on beat-matching than speech emphasis.
3. Descript
Descript takes a unique approach to auto zoom by treating video editing like text editing. You edit your video by editing the transcript, and Descript's \"Fancy Captions\" feature includes automatic zoom effects that trigger on specific words or phrases. This is brilliant for educational content, interviews, or any video where certain keywords deserve emphasis. You simply highlight a word in the transcript, apply a zoom effect, and Descript handles the keyframing.
The transcript-based workflow is either a revelation or a learning curve, depending on your editing background. Traditional editors might find it counterintuitive at first, but once you adapt, it's incredibly fast. You can add zooms to every instance of a specific word (like your product name) with a single command, or manually place them at key moments. Descript also offers \"Automatic Zoom\" that analyzes your content and suggests zoom points, which you can accept, reject, or modify. This hybrid approach gives you AI assistance without surrendering control.
Descript's pricing starts at $12/month for the Creator plan, which includes 10 hours of transcription and all editing features. The Pro plan ($24/month) adds more transcription hours and removes the Descript watermark. The tool is best suited for creators who value precision and are willing to invest time learning a different editing paradigm. Its zoom effects are smooth and professional, though not as dynamic or music-reactive as tools like CapCut. If you're already using Descript for transcription or podcast editing, adding auto zoom to your workflow is seamless.
4. Submagic
Submagic specializes in animated captions and auto zoom for talking-head videos, making it a favorite among coaches, educators, and personal brand creators. Its auto zoom feature is specifically tuned for speech-driven content; the AI detects moments of vocal emphasis (louder volume, pitch changes, pauses) and adds subtle punch-ins that reinforce your message. The zooms are gentle enough to feel professional but noticeable enough to maintain visual interest.
What makes Submagic particularly effective is how its zoom and caption features work together. When you emphasize a word, Submagic can simultaneously zoom in and highlight that word in the captions with a different color or animation. This dual emphasis is powerful for retention; viewers get both visual and textual reinforcement of your key points. The tool also offers emoji insertion, which might sound gimmicky but actually performs well on platforms like TikTok and Instagram when used strategically.
Submagic is cloud-based, so there's no software to install, and rendering happens on their servers. This means performance is consistent regardless of your computer specs, though you do need a stable internet connection. Pricing starts at $20/month for 100 minutes of video, with higher tiers offering more minutes and advanced customization. The interface is beginner-friendly, with most creators producing their first zoomed video within 10 minutes of signing up. If your content is primarily talking-head or interview-style, Submagic's speech-optimized zoom is hard to beat.
5. Pictory
Pictory is designed for marketers and teams who need to repurpose long-form content into social clips, and its auto zoom feature supports that mission. The tool analyzes your video, identifies key moments (based on speech, on-screen text, or scene changes), and applies zooms to those highlights. This is particularly useful for webinar clips, product demos, or educational content where you want to draw attention to specific features or statements.
Pictory's strength is its batch processing capability. You can upload a 30-minute video, and Pictory will generate multiple short clips, each with appropriate zooms, captions, and branding. This is a massive time-saver for content teams managing multiple social channels. The zoom styles are professional and understated, which fits corporate and B2B content better than the high-energy zooms you'd use for entertainment content. You can adjust zoom intensity and frequency, but the customization options are more limited than tools like OpusClip or CapCut.
Pricing is based on video minutes processed, starting at $23/month for 30 minutes. The Standard plan ($47/month) includes 60 minutes and removes Pictory branding. For teams, the Premium plan ($119/month) adds collaboration features and 240 minutes. Pictory is best for marketers who need reliable, professional-looking zooms at scale rather than creators seeking cutting-edge, trend-driven effects. The learning curve is minimal, and the output quality is consistently good, if not particularly distinctive.
6. Kapwing
Kapwing is a browser-based video editor that's become popular for its collaborative features and no-download convenience. Its auto zoom tool, called \"Smart Zoom,\" analyzes your video and suggests zoom points based on scene changes and audio peaks. You can accept all suggestions, pick individual zooms, or add your own manually. The interface is intuitive, with a timeline that clearly shows where each zoom occurs and simple controls for adjusting duration and intensity.
The collaborative aspect is where Kapwing shines. Multiple team members can work on the same project simultaneously, leaving comments and suggestions on specific zoom points or other edits. This is invaluable for agencies or brands with approval workflows. The tool also integrates with stock media libraries, so you can add B-roll, apply zooms to those clips, and create a complete video without leaving the browser. Rendering happens in the cloud, and exports are typically ready within a few minutes.
Kapwing offers a free tier with watermarks and limited export resolution. The Pro plan ($16/month) removes watermarks, unlocks 4K exports, and adds unlimited cloud storage. The Business plan ($67/month) includes team collaboration and priority support. The auto zoom feature is solid but not as intelligent as AI-first tools; it's more of a convenience feature within a broader editing suite. If you need a collaborative, browser-based editor and want basic auto zoom as part of that package, Kapwing is a strong choice. If auto zoom is your primary need, more specialized tools will serve you better.
7. VEED.io
VEED.io is another browser-based editor with a focus on accessibility and speed. Its auto zoom feature is straightforward: you select a clip, choose \"Auto Zoom,\" and the tool applies zooms at regular intervals or synced to audio peaks. The customization is limited compared to desktop apps, but the simplicity is the point. You can adjust zoom speed (slow, medium, fast) and intensity (subtle, moderate, dramatic), then preview the result instantly. For creators who want zooms without a learning curve, VEED delivers.
VEED's real advantage is its template library. You can start with a pre-designed template for Instagram Reels, TikTok, or YouTube Shorts, and the template includes pre-configured zoom patterns optimized for that platform. This takes the guesswork out of zoom frequency and style; you're working from patterns that have proven successful. The templates also include caption styles, transitions, and music, so you're creating platform-ready content in one workflow. This is particularly helpful for creators new to short-form video who aren't sure what \"good\" looks like yet.
Pricing starts at $18/month for the Basic plan, which includes 10 hours of video per month and removes watermarks. The Pro plan ($30/month) adds 50 hours and unlocks advanced features like custom branding. VEED is best for creators who value speed and templates over deep customization. The auto zoom won't win awards for intelligence, but it's reliable, fast, and produces clean results. If you're managing multiple clients or channels and need a repeatable process, VEED's template-based approach is efficient.
8. Animoto
Animoto is a veteran in the online video space, originally focused on slideshow-style videos but now offering full editing capabilities. Its auto zoom feature is part of its \"Smart Zoom\" toolkit, which applies zooms to photos and video clips based on focal points (faces, text, objects). This is particularly useful for product videos or real estate content where you want to highlight specific features. The AI detects what's important in the frame and zooms accordingly, which works well for static or slow-moving shots.
Animoto's workflow is template-driven. You choose a template, upload your media, and the tool applies zooms, transitions, and music automatically. You can then customize individual elements, including adjusting zoom timing and intensity. The templates are polished and professional, skewing toward business and marketing use cases rather than entertainment. This makes Animoto a good fit for small business owners, real estate agents, or corporate marketers who need good-looking videos without mastering complex editing software.
The pricing is straightforward: $16/month for the Professional plan, which includes unlimited videos and removes Animoto branding. The Team plan ($49/month) adds collaboration features and brand management tools. Animoto's auto zoom is competent but not cutting-edge; it's a reliable tool for business content rather than a creative powerhouse for viral social media. If you're creating product demos, testimonial videos, or marketing content and want automated zooms that look professional, Animoto delivers consistent quality.
9. InVideo
InVideo is a comprehensive video creation platform with a strong focus on templates and AI assistance. Its auto zoom feature is part of its \"Intelligent Editor,\" which analyzes your script or voiceover and applies zooms at moments of emphasis. You can also trigger zooms based on on-screen text or scene changes. The tool offers multiple zoom styles, from subtle push-ins to dramatic punch effects, and you can mix styles within a single video for variety.
InVideo's template library is massive, with thousands of options for different industries, platforms, and content types. Each template includes pre-configured zoom patterns, so you're starting from a proven structure rather than building from scratch. This is helpful for creators who produce similar content regularly; you can save your customized template and reuse it, ensuring consistent zoom styling across all your videos. The tool also includes a stock media library, so you can add B-roll and apply zooms without sourcing footage separately.
Pricing starts at $15/month for the Business plan, which includes 60 minutes of video per month and removes watermarks. The Unlimited plan ($30/month) removes the monthly minute cap and adds premium features. InVideo is best for creators and marketers who want a complete video creation solution with auto zoom as one component. The learning curve is moderate; the interface is feature-rich, which means more power but also more complexity. If you're willing to invest time learning the platform, it's a versatile tool that can handle everything from social clips to full marketing videos.
10. Zubtitle
Zubtitle is a specialized tool for adding captions and zooms to video content, with a particular focus on social media optimization. Its auto zoom feature is simple but effective: the tool analyzes your audio, detects moments of emphasis or pauses, and applies gentle zooms that maintain viewer attention without overwhelming the content. The zooms are subtle, which makes them ideal for professional or educational content where you want polish without flash.
Zubtitle's workflow is streamlined for speed. You upload a video, the tool generates captions and suggests zoom points, and you can adjust both before exporting. The caption and zoom features are designed to work together; when a key word appears in the captions, Zubtitle can apply a zoom at that moment for double emphasis. This is effective for retention, as viewers get both visual and textual cues to pay attention. The tool also offers headline overlays and progress bars, creating a complete social video package.
Pricing is based on video minutes, starting at $19/month for 50 minutes. The Premium plan ($39/month) includes 150 minutes and removes Zubtitle branding. The tool is best for creators who prioritize captions and want auto zoom as a complementary feature. The zoom intelligence isn't as advanced as tools like OpusClip or Submagic, but it's reliable and produces professional results. If you're creating content for LinkedIn, Facebook, or other platforms where captions are essential and zooms are a nice-to-have, Zubtitle is a solid, affordable option.
How to Choose the Right Tool for Your Workflow
Start by identifying your primary content type and platform. If you're creating talking-head videos for TikTok or Instagram, tools like Submagic or OpusClip that emphasize speech-driven zooms will serve you best. If you're producing music-driven content or dance videos, CapCut's beat-sync zoom is unmatched. For long-form content that you're repurposing into clips, OpusClip or Pictory offer the best combination of clipping intelligence and zoom automation. Match the tool's strengths to your content's needs rather than choosing based on features you won't use.
Consider your technical comfort level and available time. Browser-based tools like Kapwing, VEED, and Zubtitle require no installation and have gentler learning curves, making them ideal for beginners or creators who want results fast. Desktop apps and plugins offer more power and customization but demand more time to master. Mobile apps like CapCut are perfect for creators who shoot and edit on the same device and value convenience over precision. Be honest about how much time you're willing to invest in learning a new tool; a powerful editor you never fully learn is less valuable than a simple tool you use confidently.
Budget matters, but calculate total cost of ownership, not just subscription price. A $30/month tool that saves you 10 hours per month is cheaper than a $10/month tool that still requires significant manual work. Factor in rendering time, export limits, and whether you'll need to upgrade as your channel grows. Also consider whether you need the tool year-round or seasonally; some platforms offer pay-as-you-go options that can be more economical for sporadic users. Finally, take advantage of free trials; most tools offer 7 to 14-day trials that let you test with your actual content before committing.
Testing and Iteration
Once you've chosen a tool, don't expect perfect results immediately. Auto zoom algorithms make educated guesses, but they don't know your content's intent or your audience's preferences. Plan to spend time adjusting the AI's suggestions, tweaking zoom intensity, and finding the right frequency for your style. Most tools improve with use; they learn from your edits and make better suggestions over time. Track your video performance metrics (watch time, retention graphs, engagement) to see which zoom patterns resonate with your audience.
Experiment with different zoom styles for different content types. A high-energy zoom pattern that works for comedy sketches might feel jarring in a tutorial. Subtle, infrequent zooms might suit long-form educational content, while rapid, beat-synced zooms could elevate a product showcase. Don't be afraid to mix manual and automatic zooms; use the AI for the bulk of the work, then add a few manual zooms at critical moments for extra impact. The goal is efficiency without sacrificing quality, and that balance looks different for every creator.
Frequently Asked Questions
Do auto zoom tools work with all video formats and resolutions?
Most modern auto zoom tools support standard formats like MP4, MOV, and AVI, and can handle resolutions from 720p to 4K. However, processing time increases significantly with higher resolutions, and some tools limit 4K exports to premium plans. If you're working with unusual formats or very high frame rates (60fps or higher), check the tool's specifications before subscribing. Cloud-based tools generally handle format conversion automatically, while desktop apps may require you to export in a specific format first.
Can I use auto zoom tools for long-form content, or are they only for short videos?
While auto zoom tools are optimized for short-form content, many work well with long-form videos. Tools like OpusClip and Pictory are specifically designed to clip long videos into shorts while adding zooms, making them ideal for repurposing podcasts, webinars, or tutorials. However, applying zooms to an entire 30-minute video would be overwhelming; the best practice is to use these tools to create short clips from long content, then apply zooms to those clips. If you need zooms throughout a long video, use them sparingly at key moments rather than continuously.
Will auto zoom effects look robotic or obviously AI-generated?
This depends entirely on the tool and your settings. Early auto zoom tools did produce robotic, predictable patterns that viewers could spot immediately. Modern AI-driven tools like OpusClip, Submagic, and Descript analyze your content contextually and vary zoom timing, speed, and intensity to feel more natural. The key is customization; even the best AI needs your input to match your brand and style. Start with AI suggestions, then adjust frequency and intensity until the zooms feel intentional rather than automated. With proper tuning, viewers won't distinguish AI zooms from manual ones.
How do auto zoom tools handle faces and important objects in the frame?
Advanced tools use computer vision to detect faces, text, and key objects, then apply zooms that keep these elements properly framed. OpusClip, for example, combines auto zoom with automatic reframing to ensure faces stay centered even as the zoom occurs. Simpler tools may zoom to the center of the frame regardless of composition, which can cut off faces or important elements. If your content features people or products that must stay in frame, choose tools with object detection capabilities and test thoroughly before committing to a workflow.
Can I combine auto zoom with other effects like transitions and filters?
Yes, and this is often where auto zoom becomes most powerful. Most tools allow you to layer zooms with captions, transitions, color grading, and other effects. OpusClip, for instance, combines zooms with animated captions and brand overlays in a single workflow. CapCut lets you add filters, stickers, and transitions alongside beat-synced zooms. The key is not to overdo it; too many simultaneous effects create visual chaos. A good rule is to use zoom as your primary motion effect, then add one or two complementary elements (like captions or subtle transitions) rather than stacking multiple motion effects.
Do I need different zoom settings for different social media platforms?
Platform culture and audience expectations do vary, which can influence your zoom strategy. TikTok audiences expect fast-paced, energetic zooms that hit frequently, often synced to music. Instagram Reels viewers tolerate slightly more subtle zooms, especially for educational or lifestyle content. YouTube Shorts audiences fall somewhere in between, appreciating zooms that emphasize key points without overwhelming the content. LinkedIn and Facebook audiences generally prefer professional, understated zooms. Many tools offer platform-specific presets that encode these preferences, which is a helpful starting point. Monitor your retention metrics on each platform to see which zoom frequency and intensity performs best.
What's the difference between auto zoom and manual zoom, and when should I use each?
Auto zoom uses AI to analyze your content and place zooms at moments of emphasis, scene changes, or audio peaks, saving you the time of manually keyframing each effect. Manual zoom gives you complete control over timing, speed, and intensity but requires significantly more editing time. The best workflow combines both: use auto zoom to handle the bulk of your video, then add manual zooms at critical moments (like a key punchline or product reveal) where you want precise control. This hybrid approach gives you efficiency without sacrificing quality at the
FAQs
No items found.