12 Best Auto Jump-Cut Editors for YouTube & TikTok
November 17, 2025
I've spent countless hours manually cutting out pauses, filler words, and dead air from videos, and I can tell you it's one of the most tedious parts of content creation. Every \"um,\" \"uh,\" and awkward silence needs to be identified and removed, turning what should be a quick editing session into an hours-long ordeal. The good news is that auto jump-cut editors have transformed this process, using AI to detect and remove these moments automatically, saving creators dozens of hours every month.
In this guide, I'm breaking down the 12 best auto jump-cut editors available today. Whether you're creating YouTube videos, TikTok content, or Instagram Reels, these tools will help you produce polished, engaging videos in a fraction of the time. I'll cover their key features, pricing, strengths, and ideal use cases so you can choose the right editor for your workflow and budget.
Key Takeaways
- Auto jump-cut editors use AI to remove silences and filler words automatically, saving creators hours of tedious manual editing work.
- The best tool depends on your workflow, content type, and budget; options range from simple browser-based editors to comprehensive platforms like OpusClip.
- Always review AI-generated cuts before finalizing to ensure natural pacing and avoid removing important pauses or context.
- Combine auto jump-cut editing with other techniques like B-roll coverage and strategic pauses for more professional results.
- Clean source audio significantly improves AI accuracy, so invest in decent recording equipment and quiet environments.
- Batch processing multiple videos with saved presets can dramatically increase efficiency for regular content creators.
- Different content types require different cutting aggressiveness; tutorials need more pauses than fast-paced social media content.
What Is Auto Jump-Cut Editing and Why It Matters
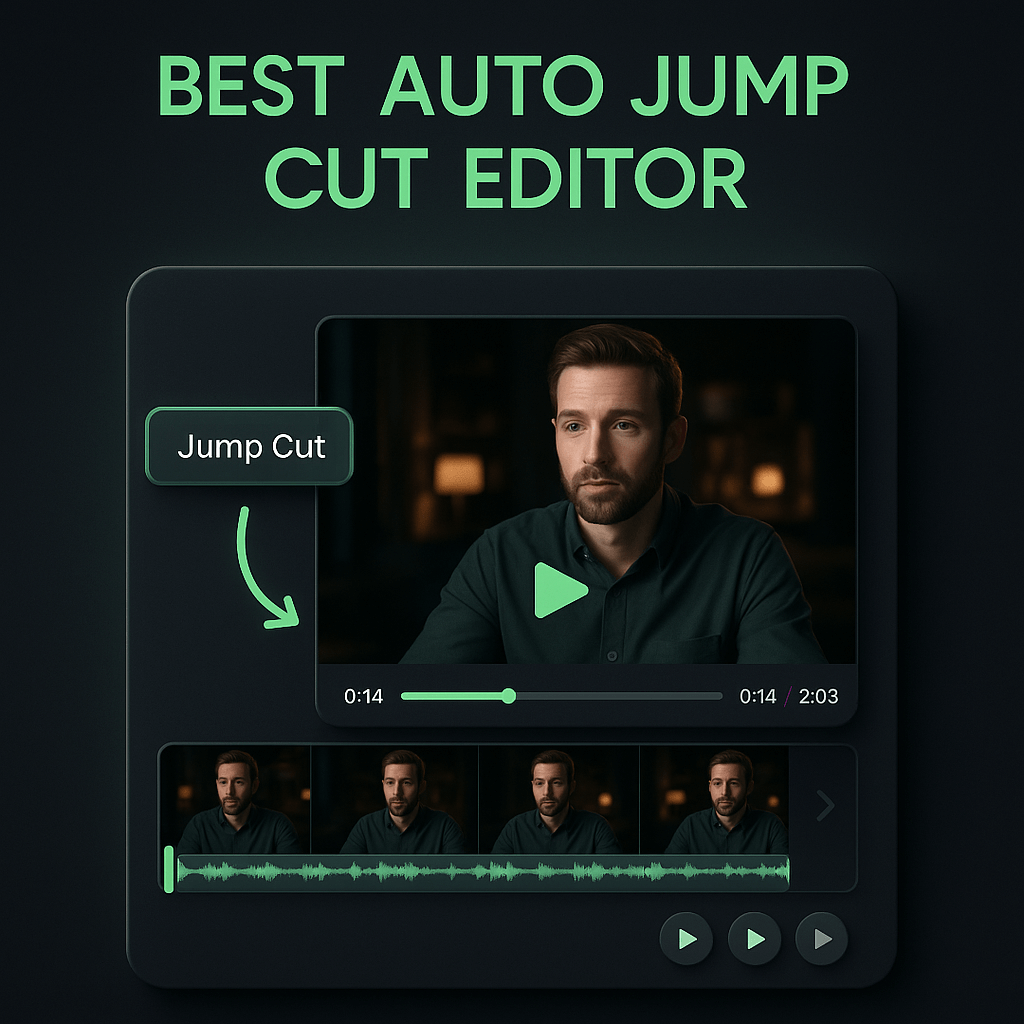
Auto jump-cut editing uses artificial intelligence to analyze your video's audio track and automatically remove silent portions, pauses, and filler words like \"um,\" \"uh,\" \"like,\" and \"you know.\" Instead of scrubbing through your timeline manually to find these moments, the software does it for you in seconds. This technology has become essential for modern content creators who need to maintain a fast-paced, engaging style that keeps viewers watching.
The impact on your workflow is dramatic. What used to take two or three hours of tedious cutting can now be done in under five minutes. Beyond time savings, auto jump-cut editing helps maintain consistent pacing across your content, which is crucial for audience retention on platforms like YouTube and TikTok. When viewers encounter long pauses or excessive filler words, they're more likely to scroll away or click off your video. These tools help you maintain the energy and momentum that modern audiences expect.
How Auto Jump-Cut Technology Works
Most auto jump-cut editors use speech recognition and audio analysis to identify segments worth removing. The software scans your audio waveform looking for drops in volume that indicate silence or pauses. More advanced tools go further by using natural language processing to detect specific filler words and even analyze the context to avoid cutting important pauses for emphasis or comedic timing. You typically get a preview of all suggested cuts, allowing you to review and adjust before finalizing, which gives you control while still saving massive amounts of time.
The Business Case for Automated Editing
For professional creators and marketing teams, time literally equals money. If you're producing three videos per week and spending two hours on jump cuts for each one, that's six hours weekly or roughly 300 hours annually. At even a modest hourly rate, that's thousands of dollars in labor costs. Auto jump-cut editors typically cost between ten and fifty dollars monthly, making the return on investment obvious. Beyond direct cost savings, faster editing means you can publish more frequently, test more content ideas, and respond to trends while they're still relevant.
Top 12 Auto Jump-Cut Editors Compared
I've tested dozens of auto jump-cut editors to bring you this curated list. Each tool has unique strengths, and the best choice depends on your specific needs, budget, and existing workflow. Some excel at speed, others at precision, and a few offer comprehensive editing suites beyond just jump cuts. Here's my detailed breakdown of the top options available today.
1. OpusClip
OpusClip stands out as a comprehensive AI video repurposing platform that includes powerful auto jump-cut capabilities alongside its core clipping features. While many creators know OpusClip for turning long-form content into viral short clips, its editing tools include automatic silence removal and filler word detection that work seamlessly with its AI-powered reframing and captioning. What I appreciate most is how OpusClip integrates jump-cut editing into a complete workflow, from identifying the best moments in your footage to adding animated captions and applying your brand kit. The platform analyzes your content holistically, ensuring that cuts maintain narrative flow while removing unnecessary pauses.
OpusClip's jump-cut feature is particularly effective for creators who record talking-head content, interviews, or educational videos. The AI understands context well enough to preserve intentional pauses while removing awkward silences and filler words. You can adjust sensitivity settings to control how aggressive the cutting is, and the preview function lets you review every edit before exporting. For teams managing multiple content channels, OpusClip's brand kit feature ensures consistent styling across all your auto-edited clips, maintaining professional quality at scale.
2. Descript
Descript revolutionized video editing by treating your transcript as the editing interface. You edit video by editing text, which makes removing filler words and pauses incredibly intuitive. Simply select the word \"um\" in your transcript and delete it, and Descript removes it from your video automatically. The platform's \"Remove Filler Words\" button can eliminate all instances of common fillers across your entire project in one click. Descript also offers \"Shorten Word Gaps\" to automatically tighten up pauses between words and sentences, creating that snappy, professional pacing.
What sets Descript apart is its Studio Sound feature, which enhances audio quality while you're making cuts, and Overdub, which can generate synthetic voice to fix mistakes without re-recording. The learning curve is minimal if you're comfortable with text editing, making it accessible for beginners while offering depth for advanced users. Pricing starts at twelve dollars monthly for the Creator plan, with higher tiers offering more transcription hours and advanced features.
3. Adobe Premiere Pro with Auto Reframe
Adobe Premiere Pro remains the industry standard for professional video editing, and its recent AI-powered features include solid auto jump-cut capabilities through the \"Edit\" menu's silence detection. You can set threshold levels for what constitutes silence and minimum duration for clips, giving you granular control over the cutting process. Premiere Pro then generates cuts on your timeline that you can review, adjust, or apply instantly. The advantage here is integration with Premiere's complete editing ecosystem, including color grading, effects, and multi-cam editing.
The downside is complexity and cost. Premiere Pro requires a Creative Cloud subscription starting at twenty-three dollars monthly, and the interface can overwhelm newcomers. However, if you're already using Premiere for your main editing workflow, the built-in jump-cut features eliminate the need for a separate tool. The software's performance with large 4K files is excellent, and you maintain full control over every aspect of your edit, which professionals often require.
4. Kapwing
Kapwing offers a browser-based editing suite that includes effective auto jump-cut tools without requiring software installation. Its \"Remove Silences\" feature analyzes your video and automatically cuts out pauses based on your specified threshold. The interface is clean and intuitive, making it perfect for creators who want quick results without a steep learning curve. Kapwing also includes subtitle generation, resizing for different platforms, and basic editing tools all in one place.
The browser-based approach means you can edit from any device, including Chromebooks or tablets, which is ideal for creators on the go. Kapwing's free tier allows limited exports, while paid plans start at sixteen dollars monthly for individuals. The platform works well for social media content creators who need to produce multiple short videos quickly and don't require advanced color grading or effects.
5. Gling AI
Gling AI is purpose-built specifically for removing bad takes, silences, and filler words from videos. After uploading your raw footage, Gling's AI processes it and delivers a cleaned-up version with all the dead air removed, typically within minutes. The tool is designed for YouTube creators and focuses exclusively on this one task, which it does exceptionally well. You can adjust how aggressive the cutting is and review all changes before exporting.
What makes Gling unique is its simplicity and speed. There's no complex interface to learn; you upload, adjust settings, and download your improved video. This focused approach means faster processing times compared to full editing suites. Pricing starts at fifteen dollars monthly, making it affordable for creators who primarily need jump-cut functionality and plan to do other editing elsewhere. Gling exports to popular formats and can also generate an XML file for further editing in Premiere Pro or Final Cut Pro.
6. Final Cut Pro with Auto Silences
Final Cut Pro, Apple's professional editing software, includes built-in silence detection that automatically identifies and removes quiet sections from your timeline. The feature is found under the \"Edit\" menu and allows you to set custom thresholds for what constitutes silence and minimum gap duration. Final Cut Pro then creates cuts that you can review and modify before committing. The advantage is seamless integration with the rest of Final Cut's powerful editing tools, including magnetic timeline, color grading, and motion graphics.
Final Cut Pro requires a one-time purchase of three hundred dollars, which is more economical than subscription models if you plan to use it long-term. The software is Mac-only, which limits its audience, but for Apple users it offers excellent performance and optimization. The magnetic timeline makes adjusting cuts intuitive, as clips automatically snap together when you remove sections, maintaining sync without creating gaps.
7. Riverside.fm
Riverside.fm started as a remote recording platform but has evolved into a complete editing suite with strong auto jump-cut features. Its \"Magic Clips\" and editing tools include automatic silence removal that works directly on your recorded content. Since Riverside records locally on each participant's device, you get high-quality source files that the AI can then clean up automatically. This makes it particularly valuable for podcast video, interviews, and remote collaboration content.
The integrated workflow is Riverside's biggest strength. You record, edit, and export all within the same platform, eliminating file transfers and compatibility issues. The AI editing tools include filler word removal, silence cutting, and even automatic clip creation for social media. Pricing starts at fifteen dollars monthly for the basic plan, with higher tiers offering more recording hours and advanced features. For creators who regularly record remote interviews or podcast content, Riverside offers exceptional value by combining recording and editing.
8. Recut
Recut is a specialized plugin for Adobe Premiere Pro and Final Cut Pro that focuses exclusively on removing silences from your timeline. After installing Recut, you select your clips and run the plugin, which analyzes audio and creates cuts based on your threshold settings. The plugin is fast, processing even hour-long videos in seconds, and integrates seamlessly into your existing editing workflow. You maintain full control in your primary editing software while benefiting from automated cutting.
Recut costs ninety-nine dollars for a lifetime license, making it a one-time investment rather than a recurring subscription. This pricing model appeals to professional editors who want to add jump-cut automation to their existing Premiere or Final Cut workflow without changing their entire editing approach. The plugin is lightweight, doesn't slow down your system, and works with any video format your editing software supports.
9. Submagic
Submagic specializes in creating short-form social media content with auto-generated captions, but it also includes effective silence removal and jump-cut features. The platform is designed specifically for TikTok, Instagram Reels, and YouTube Shorts creators who need fast, engaging content. Submagic's AI removes pauses and filler words while simultaneously adding animated captions, emojis, and visual effects that match trending styles on social platforms.
What makes Submagic valuable is its understanding of social media content trends. The tool doesn't just remove silences; it helps you create videos that match the pacing and style that performs well on each platform. You can choose from templates that include specific caption styles, transitions, and effects popular on TikTok or Instagram. Pricing starts at twenty dollars monthly, and the platform includes unlimited exports on higher tiers, making it cost-effective for high-volume creators.
10. Pictory
Pictory uses AI to transform long-form content into short, engaging videos, and its editing capabilities include automatic removal of silences and filler words. You can upload a video or even just a script, and Pictory will create a polished video with jump cuts, stock footage, music, and captions. The platform is particularly useful for repurposing existing content like webinars, podcasts, or YouTube videos into multiple social media clips.
Pictory's strength is its end-to-end automation. Beyond just removing silences, it can identify key moments, add relevant visuals, and create multiple versions optimized for different platforms. This makes it ideal for marketing teams who need to maximize content output from limited source material. Pricing starts at twenty-three dollars monthly for the standard plan, with higher tiers offering more video creation hours and advanced features like API access.
11. Camtasia
Camtasia, known primarily as screen recording software, includes \"Remove a Color\" and audio editing features that can function as jump-cut tools. While not as automated as dedicated AI tools, Camtasia's \"Silence Removal\" feature under audio effects can detect and remove quiet sections from your recordings. This is particularly useful for tutorial creators and educators who record screen captures with voiceover and need to tighten up their pacing.
Camtasia's one-time purchase model (around three hundred dollars) appeals to users who prefer owning their software rather than subscribing. The learning curve is moderate, and the software includes annotations, transitions, and quiz features that make it comprehensive for educational content. While the jump-cut automation isn't as sophisticated as AI-first tools, it's sufficient for many creators and integrates well with the screen recording workflow.
12. Animoto
Animoto is primarily a video creation platform with templates and stock media, but it includes basic editing tools that can help streamline your content. While it doesn't offer advanced AI jump-cut features like other tools on this list, it allows you to trim clips easily and create fast-paced videos using its drag-and-drop interface. Animoto is best for marketers and small business owners who need to create professional-looking videos quickly without extensive editing knowledge.
The platform's strength is simplicity and speed. You can create a polished marketing video in minutes using templates, stock footage, and music from Animoto's library. While you'll need to make cuts manually rather than relying on AI automation, the streamlined interface makes this faster than traditional editing software. Pricing starts at sixteen dollars monthly for individuals, with business plans offering additional features and team collaboration tools.
How to Choose the Right Auto Jump-Cut Editor
Selecting the best auto jump-cut editor depends on several factors beyond just features and price. I recommend considering your entire content workflow, technical skill level, and specific content type when making your decision. A tool that's perfect for a solo YouTube creator might not work well for a marketing team producing multiple video types, and vice versa. Here's how to evaluate your options systematically.
Assess Your Content Volume and Type
Start by analyzing how much content you produce and what format it takes. If you're creating three to five short videos weekly, a simple browser-based tool like Kapwing or a specialized app like Gling might be perfect. However, if you're producing daily content across multiple platforms, you'll benefit from a more robust solution like OpusClip that can handle repurposing and editing in one workflow. Consider whether your content is primarily talking-head videos, screen recordings, interviews, or a mix, as some tools specialize in specific formats.
Evaluate Integration with Your Existing Workflow
Think about your current editing setup. If you're already using Adobe Premiere Pro or Final Cut Pro for color grading and effects, adding a plugin like Recut or using built-in silence detection makes more sense than switching to a completely new platform. Conversely, if you're starting fresh or currently doing minimal editing, a comprehensive platform like Descript or OpusClip that handles multiple tasks might streamline your entire process. Consider file compatibility, export formats, and whether you need to collaborate with team members who use specific software.
Consider Your Budget and ROI
Auto jump-cut editors range from free tiers with limitations to professional tools costing hundreds of dollars. Calculate your time savings to determine ROI. If a tool saves you five hours weekly and costs twenty dollars monthly, that's roughly one dollar per hour saved, which is almost always worthwhile. One-time purchases like Final Cut Pro or Recut make sense if you plan to use the tool for years, while subscriptions work better if you want regular updates and cloud features. Many platforms offer free trials, so test before committing to annual plans.
Test Accuracy and Control
Not all AI jump-cut tools are equally accurate. Some are aggressive and might cut important pauses or natural speech rhythm, while others are too conservative and leave in obvious filler. Look for tools that let you adjust sensitivity and review cuts before finalizing. The best editors give you a preview timeline where you can see every proposed cut and manually adjust or reject specific edits. This balance of automation and control ensures your final video maintains your intended pacing and style.
Step-by-Step Guide to Using Auto Jump-Cut Editors
While each tool has its own interface, the general workflow for auto jump-cut editing follows similar steps. I'll walk you through the process using best practices that apply across most platforms, helping you get the best results regardless of which tool you choose.
Step 1: Prepare Your Source Video
Before uploading to any auto jump-cut editor, ensure your source video has clean audio. Background noise, music, or multiple speakers can confuse AI detection algorithms, leading to inaccurate cuts. If possible, record in a quiet environment with a decent microphone, as clear audio helps the software distinguish between intentional speech and filler words or silence. Export your video in a high-quality format like MP4 with H.264 encoding, which most platforms handle efficiently.
Step 2: Upload and Configure Settings
Import your video to your chosen editor and locate the auto jump-cut or silence removal feature. Most tools will ask you to set a silence threshold (usually measured in decibels) and minimum duration for what constitutes a removable pause. Start with default settings for your first pass; you can always adjust and reprocess if the results are too aggressive or too conservative. Some platforms like OpusClip automatically optimize these settings based on your content type, which simplifies the process for beginners.
Step 3: Review and Refine Automated Cuts
After the AI processes your video, carefully review the suggested cuts before finalizing. Scrub through the timeline and watch for any cuts that disrupt natural speech flow or remove important pauses. Most tools highlight cut points or show you a before-and-after comparison. Add back any cuts that feel too abrupt, and manually remove additional sections the AI might have missed. This review step is crucial for maintaining your video's quality and ensuring the automated editing enhances rather than harms your content.
Step 4: Fine-Tune Pacing and Transitions
Once you're satisfied with the jump cuts, consider overall pacing. Sometimes removing all silences creates a rushed feeling that's exhausting for viewers. Add back brief pauses (half a second or so) at natural sentence breaks or before important points to give your audience time to process information. Some editors offer automatic transition effects between cuts; use these sparingly, as too many can be distracting. The goal is seamless editing that viewers don't consciously notice.
Step 5: Add Captions and Final Touches
With your jump cuts finalized, enhance your video with captions, which are essential for social media where many viewers watch without sound. Tools like OpusClip, Submagic, and Descript include automatic caption generation that syncs perfectly with your edited timeline. Review captions for accuracy, especially with technical terms or proper nouns. Add your brand colors, logo, or other visual elements to maintain consistency across your content, then export in the appropriate format and resolution for your target platform.
Step 6: Export and Optimize for Each Platform
Different platforms have different optimal specifications. YouTube handles 1080p or 4K horizontal video well, while TikTok and Instagram Reels prefer 1080x1920 vertical format. Many auto jump-cut editors include preset export options for each platform, automatically adjusting resolution, aspect ratio, and file size. If you're repurposing one video across multiple platforms, tools like OpusClip can create optimized versions for each destination, saving you from manual reformatting and ensuring your content looks professional everywhere.
Advanced Tips for Better Auto Jump-Cut Results
Once you're comfortable with basic auto jump-cut editing, these advanced techniques will help you achieve even better results and more efficient workflows. I've learned these through extensive testing and real-world content creation, and they've significantly improved both my editing speed and final video quality.
Use Strategic Pauses for Emphasis
Not all pauses are bad. Intentional silence before or after an important point creates emphasis and gives viewers time to absorb key information. When reviewing your auto-generated cuts, identify moments where you're making a crucial point or transitioning between topics, and manually add back a one to two second pause. This creates rhythm and prevents your video from feeling like a breathless monologue. The contrast between fast-paced sections and deliberate pauses actually increases engagement by varying the energy level.
Combine Jump Cuts with B-Roll
Jump cuts can sometimes feel jarring, especially in longer videos. Covering cuts with B-roll footage (supplementary visuals related to what you're discussing) creates smoother transitions and adds visual interest. When you remove a section of talking-head footage, overlay relevant B-roll during that moment. This technique is common in professional YouTube videos and makes your content feel more polished. Many auto jump-cut editors allow you to add media layers, or you can export your cut timeline and add B-roll in a more comprehensive editing tool.
Create Custom Presets for Different Content Types
If you produce multiple content formats, like tutorials, vlogs, and interviews, create saved presets with different cutting aggressiveness for each type. Tutorials might benefit from more conservative cutting that preserves instructional pauses, while vlogs can handle faster pacing with more aggressive silence removal. Most professional tools allow you to save and recall these settings, streamlining your workflow and ensuring consistency within each content category.
Batch Process Multiple Videos
If you record multiple videos in one session, batch processing can save enormous time. Upload all your raw footage to your auto jump-cut editor and apply the same settings to each video simultaneously. Tools like Descript, OpusClip, and Gling support batch processing, allowing you to walk away while the AI processes everything. When you return, you can review and refine each video individually, but the bulk of the tedious work is already done. This approach is particularly effective for series content or weekly uploads where consistency is important.
Common Mistakes to Avoid with Auto Jump-Cut Editing
Even with powerful AI tools, certain mistakes can undermine your video quality or waste time. I've made most of these errors myself when I was learning, and I want to help you avoid them. Being aware of these pitfalls will help you use auto jump-cut editors more effectively and produce better content faster.
Over-Cutting and Losing Natural Flow
The most common mistake is removing too many pauses, creating a video that feels rushed and unnatural. While fast pacing is generally good for retention, humans need brief moments to process information. If you remove every single pause, your video becomes exhausting to watch and viewers may disengage. Always review your auto-edited video at normal speed and ask yourself if it feels conversational or robotic. When in doubt, leave slightly more pause than you think necessary; you can always tighten further, but it's harder to add natural pauses back after the fact.
Ignoring Audio Quality Before Editing
Auto jump-cut tools work best with clean source audio. If your recording has background noise, echo, or inconsistent volume levels, the AI may struggle to identify true silences versus quiet speech. This leads to incorrect cuts or missed filler words. Invest time in improving your recording setup with a decent microphone and quiet environment, or use audio enhancement tools before running auto jump-cut processing. Many platforms like Descript include audio cleanup features; use these first, then apply jump cuts for better results.
Not Reviewing Before Publishing
Trusting AI completely without human review is risky. Even the best auto jump-cut editors occasionally make mistakes, cutting mid-word or removing important context. Always watch your entire edited video at least once before publishing. Pay special attention to transitions between cuts, making sure they sound natural and don't create awkward grammar or meaning changes. This review step takes only a few minutes but can prevent embarrassing errors from reaching your audience.
Using the Same Settings for All Content
Different video types require different editing approaches. An energetic vlog can handle aggressive cutting with minimal pauses, while an educational tutorial needs more breathing room for viewers to absorb complex information. Interview content might require preserving natural conversation rhythm, including some pauses and filler words that make dialogue feel authentic. Adjust your auto jump-cut settings based on content type rather than using one-size-fits-all defaults.
Frequently Asked Questions
Do auto jump-cut editors work with all video formats?
Most auto jump-cut editors support common formats like MP4, MOV, and AVI, with MP4 using H.264 encoding being the most universally compatible. Some browser-based tools have file size limits, typically between two and ten gigabytes depending on your subscription tier. If you're working with unusual formats or very large 4K files, professional software like Adobe Premiere Pro or Final Cut Pro with built-in silence detection offers the most flexibility. Always check your chosen tool's specifications before uploading large projects.
Can I use auto jump-cut editing for podcast video?
Absolutely, and podcast video is actually one of the best use cases for auto jump-cut editing. Conversations naturally include pauses, filler words, and moments where speakers overlap or restart sentences. Tools like Descript and Riverside.fm are particularly effective for podcast editing because they handle multiple speakers well and can remove filler words from each person's track independently. The key is setting your silence threshold appropriately to preserve natural conversation flow while removing awkward dead air.
Will removing all silences hurt my video's watchability?
Yes, if done too aggressively. While removing obvious dead air and excessive pauses improves pacing, eliminating every single silence creates an exhausting viewing experience. Viewers need brief moments to process information, especially in educational or complex content. The best approach is to remove clearly unnecessary pauses while preserving natural speech rhythm. Most auto jump-cut editors let you adjust sensitivity; start conservative and gradually increase aggressiveness until you find the sweet spot for your content style.
How much time can auto jump-cut editing actually save?
For a typical ten to fifteen minute video with moderate pauses and filler words, manual jump-cut editing might take one to three hours depending on your skill level. Auto jump-cut tools can process the same video in under five minutes, with perhaps another ten to fifteen minutes needed for review and refinement. That's a time savings of roughly eighty to ninety percent. For creators producing multiple videos weekly, this translates to dozens of hours saved monthly, which can be reinvested in content strategy, filming, or simply maintaining work-life balance.
Are free auto jump-cut editors worth using?
Free tiers and trials are excellent for testing whether auto jump-cut editing fits your workflow, but they typically have significant limitations like watermarks, export restrictions, or limited processing time. If you're just starting out or produce content occasionally, free options like Kapwing's basic tier or DaVinci Resolve's built-in features can work well. However, if you're creating content regularly or professionally, the time savings and additional features of paid tools quickly justify their cost. Most paid editors offer free trials, so you can test before committing.
Can auto jump-cut editors handle multiple languages?
Most modern auto jump-cut editors support multiple languages, though accuracy varies. English typically has the best support since most tools are trained primarily on English speech patterns. Major languages like Spanish, French, German, and Mandarin are generally well-supported by leading platforms like OpusClip.
FAQs
No items found.